Using Schedule Planner on your Mobile device
1. Log into Mycollege
- Go to mycollege.sunybroome.edu

2. Launch Schedule Planner
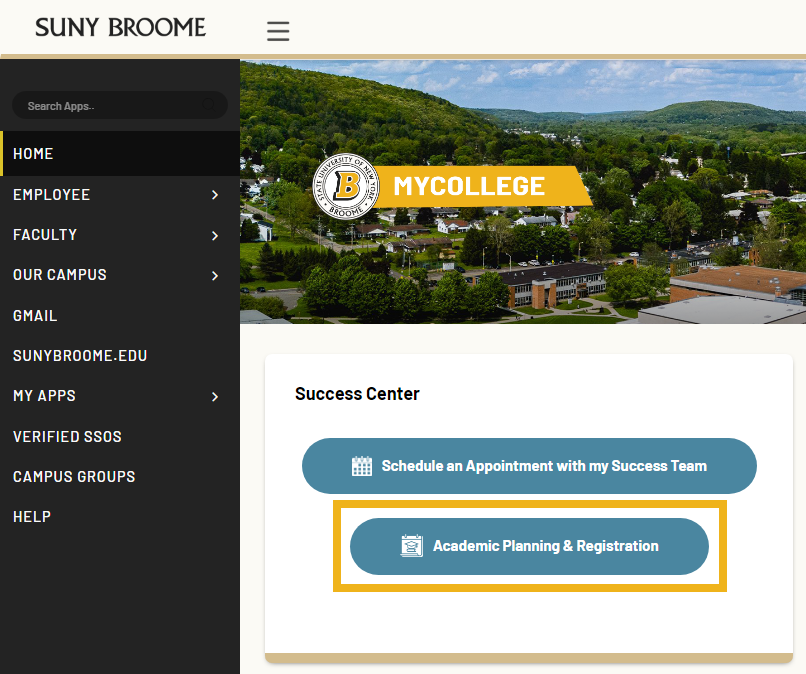
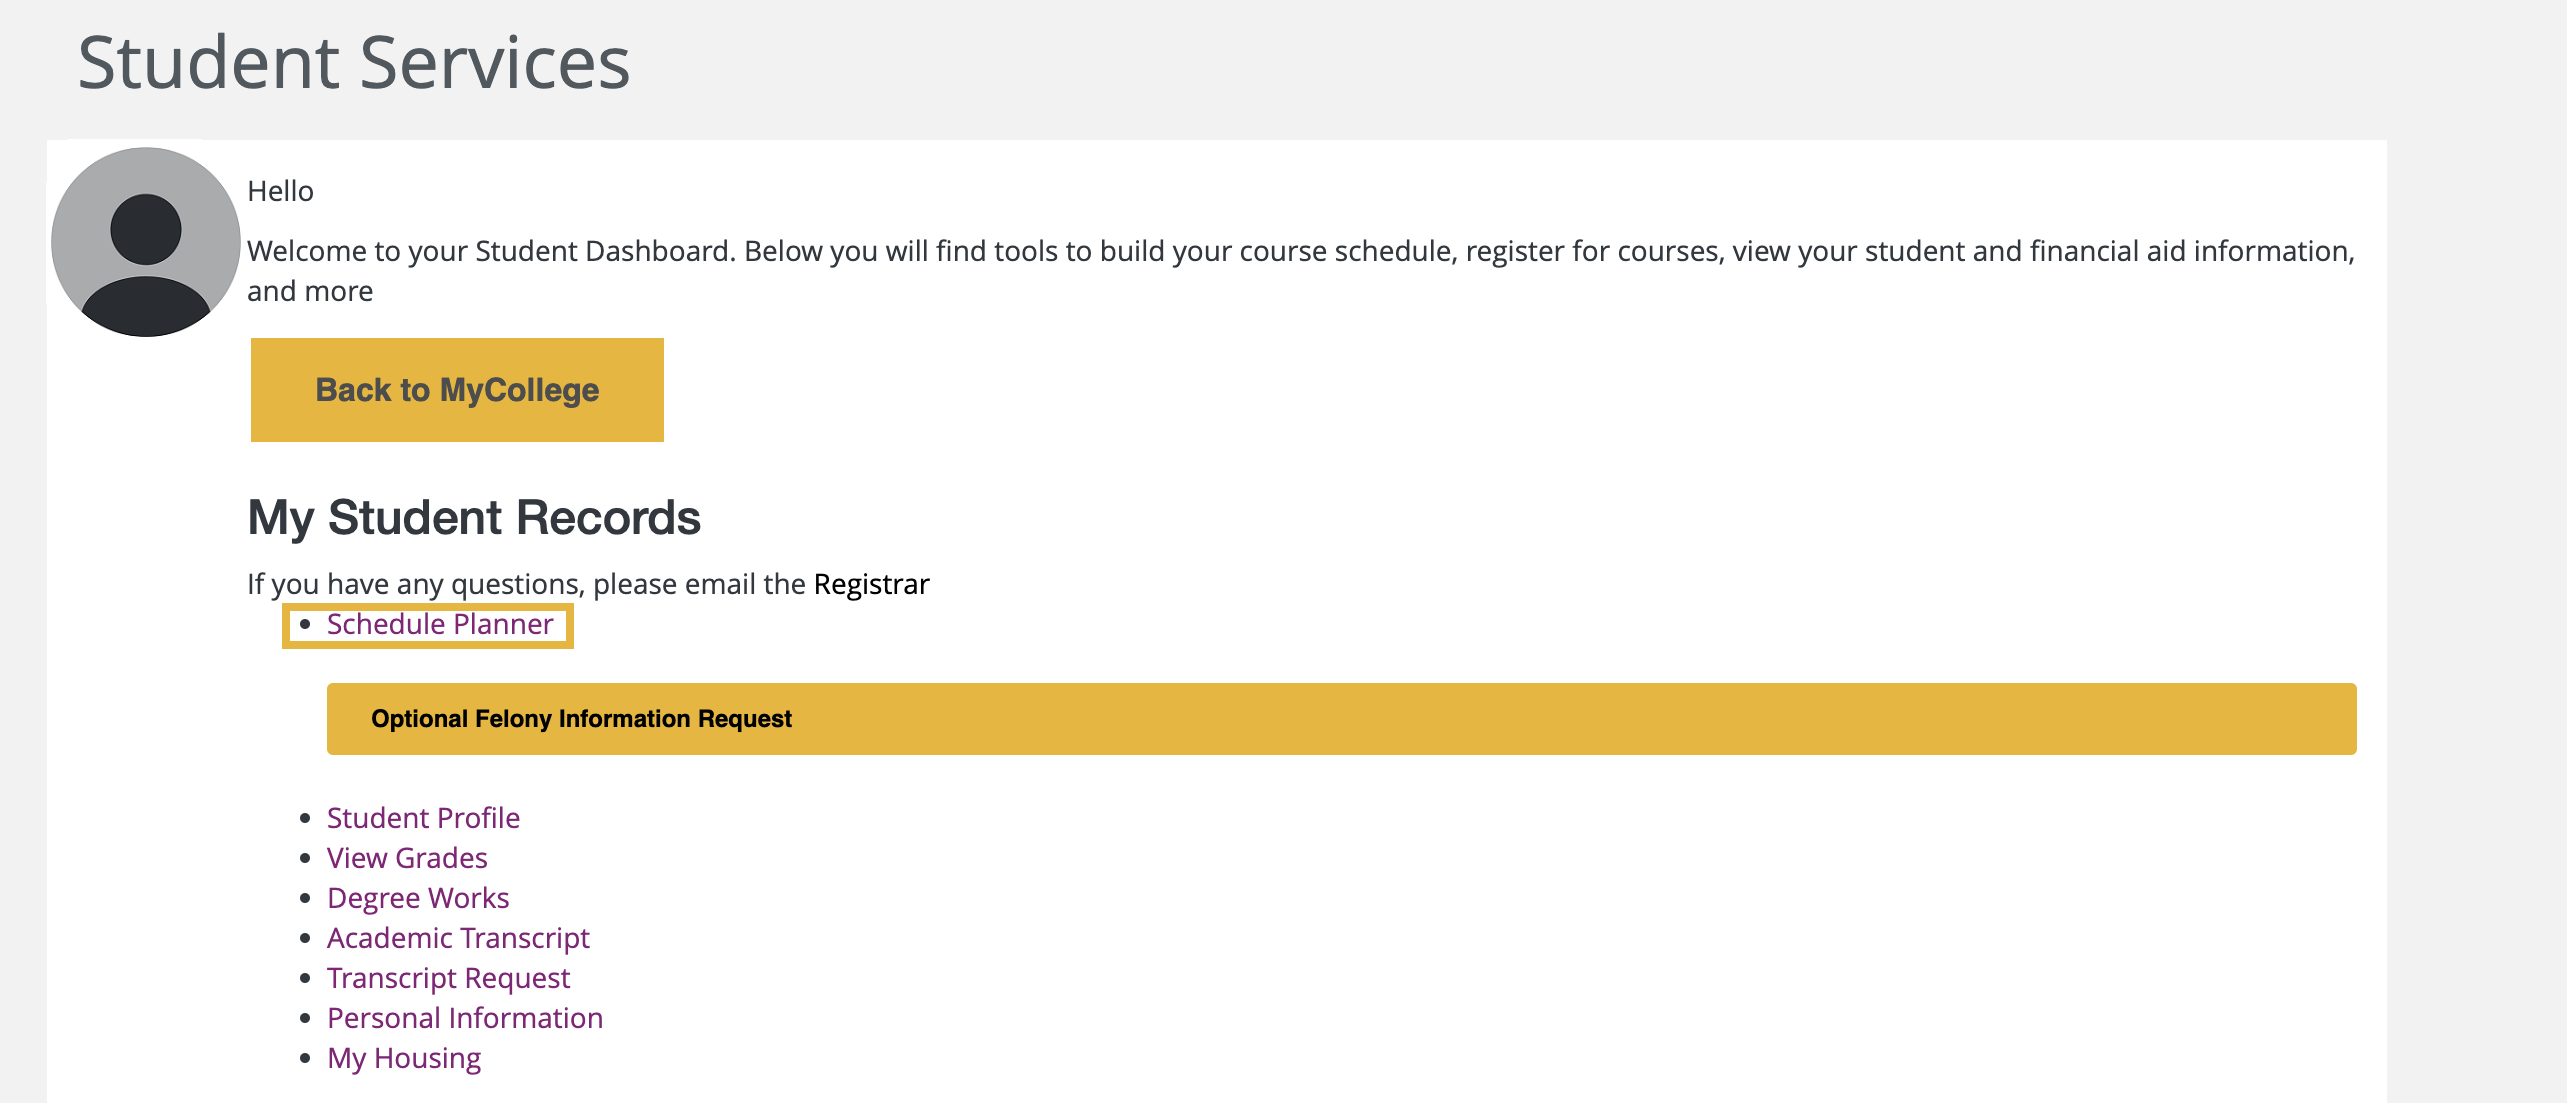
- From the MyCollege home page, locate The Success Center and select “Academic Planning & Registration”. You will be directed to the Student Services page in Banner. From this page, select ”Schedule Planner”.
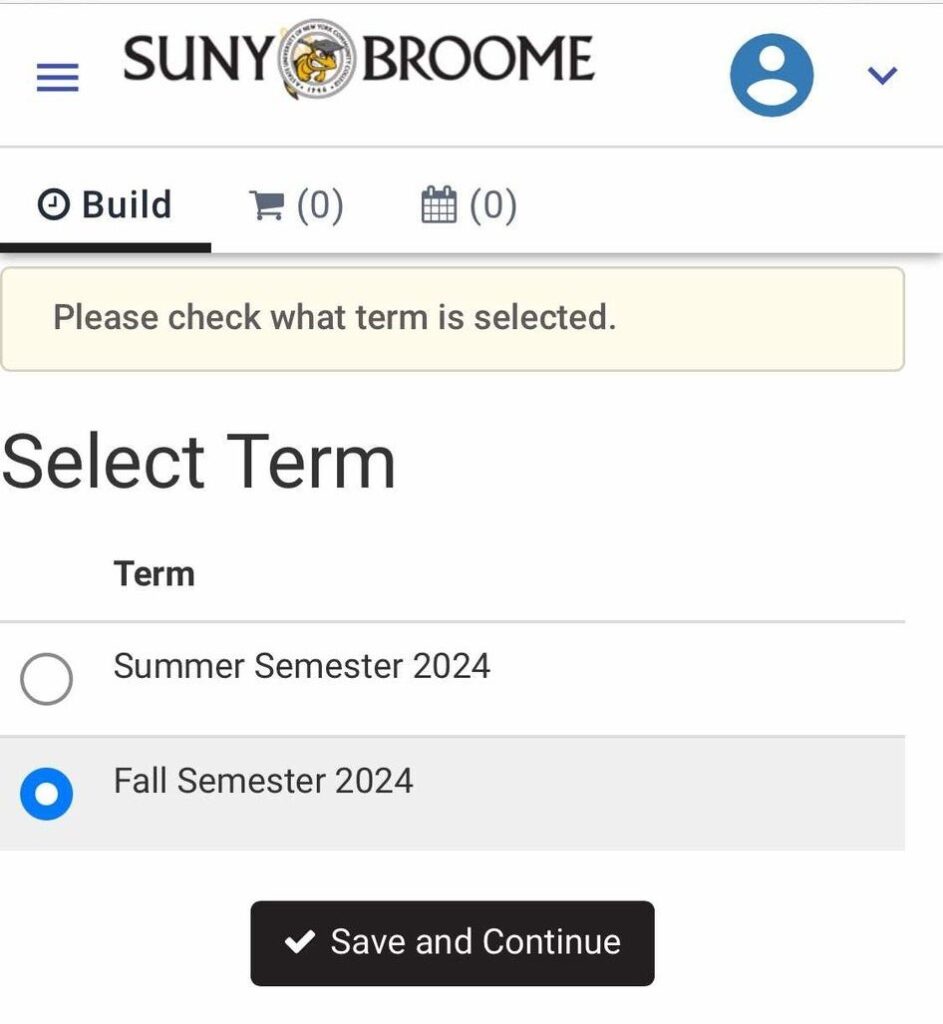
3. Select Term
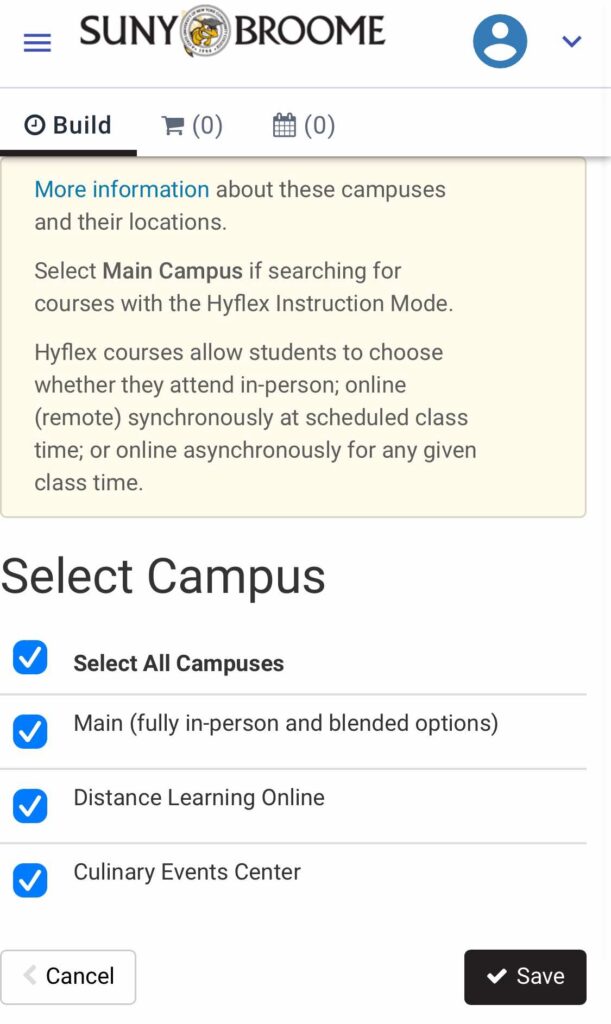
4. Select Campus
- Courses offered at these campuses will show up in your class search.
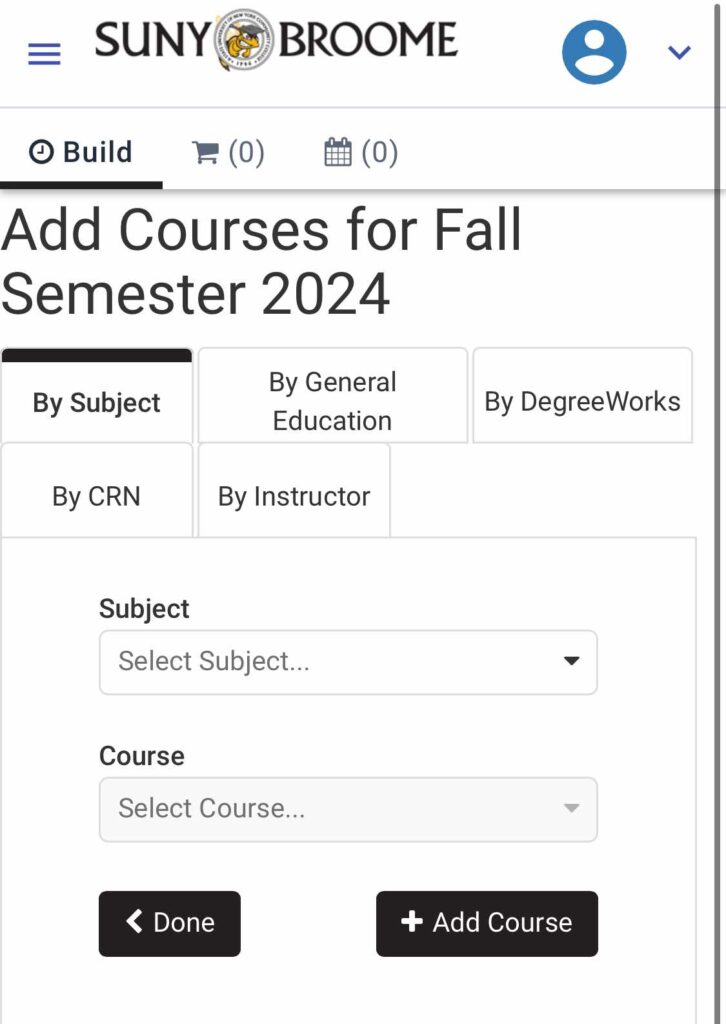
5. Add Courses
- Select “Courses” from the bottom menu then select “Add Course” in the top right.
- Search by subject, general education requirements, CRN, instructor, and/or Degree Works Plan*.
- When all desired courses are added, select “Done”.
- To narrow down the number of possible schedules, consider:
- Editing your filters for campus, course modality, or parts of term by selecting Options from the bottom menu.
- Using the +Break option to block off times when you are not available to take classes.
- For course information or to remove a course from your selections, select “Actions”.


6. Generate Schedules and View Schedules
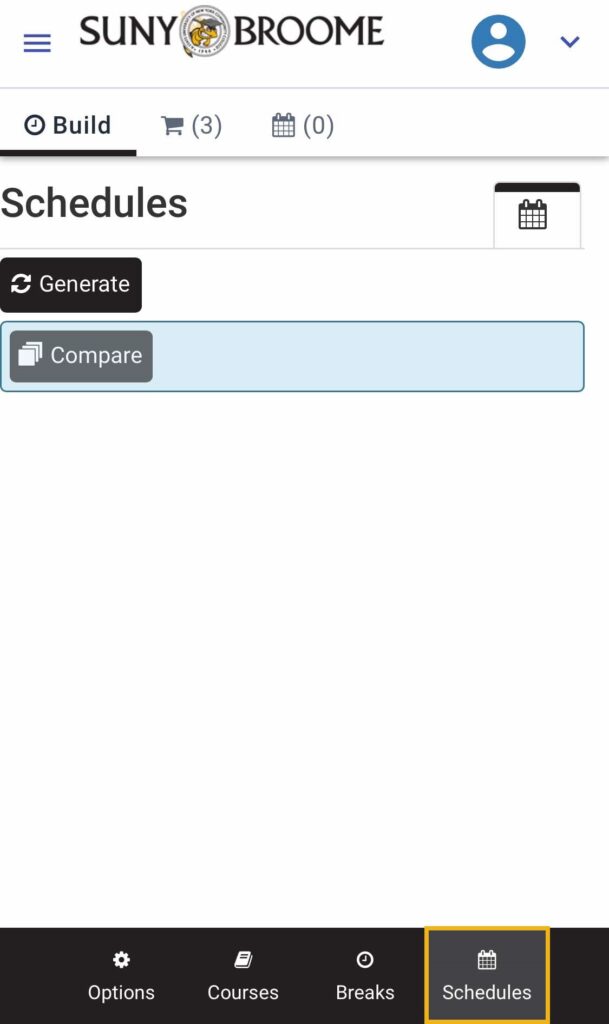
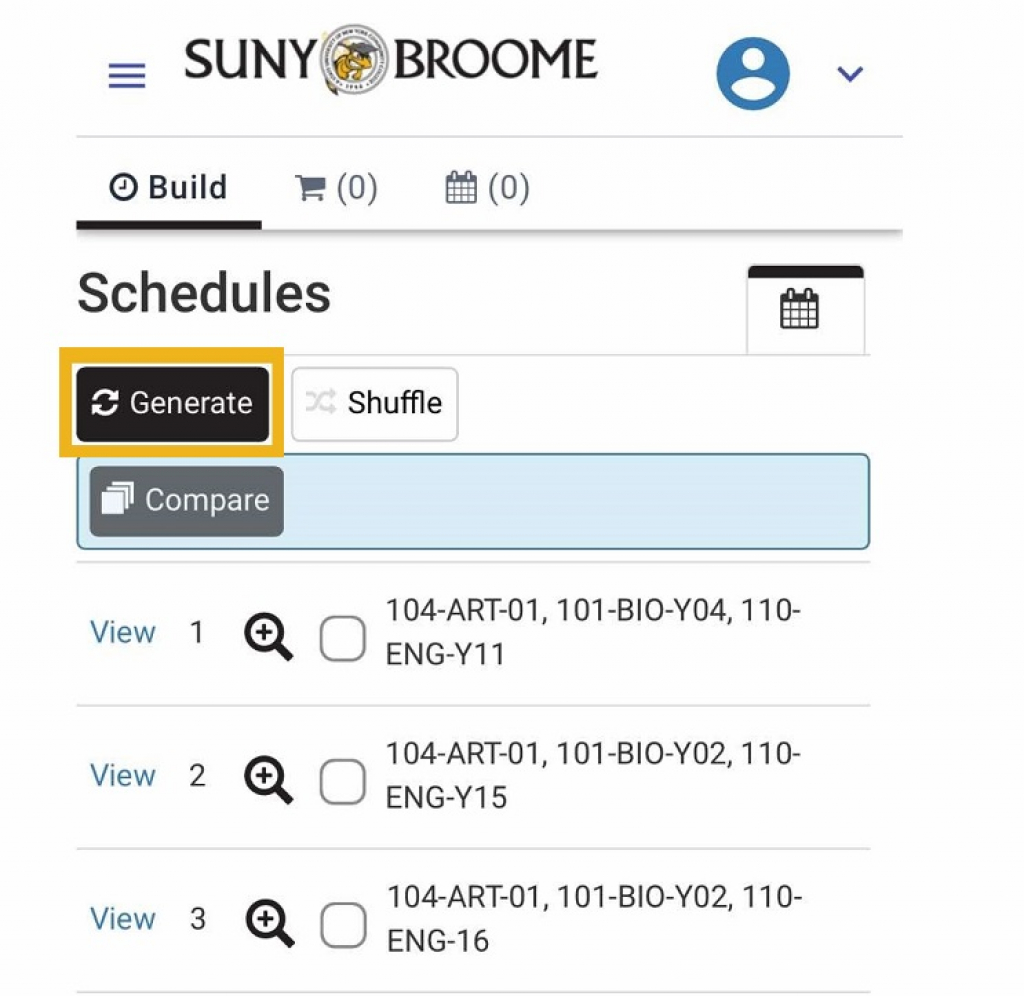
- Select “Schedules” from the bottom menu then select “Generate” in the top left.
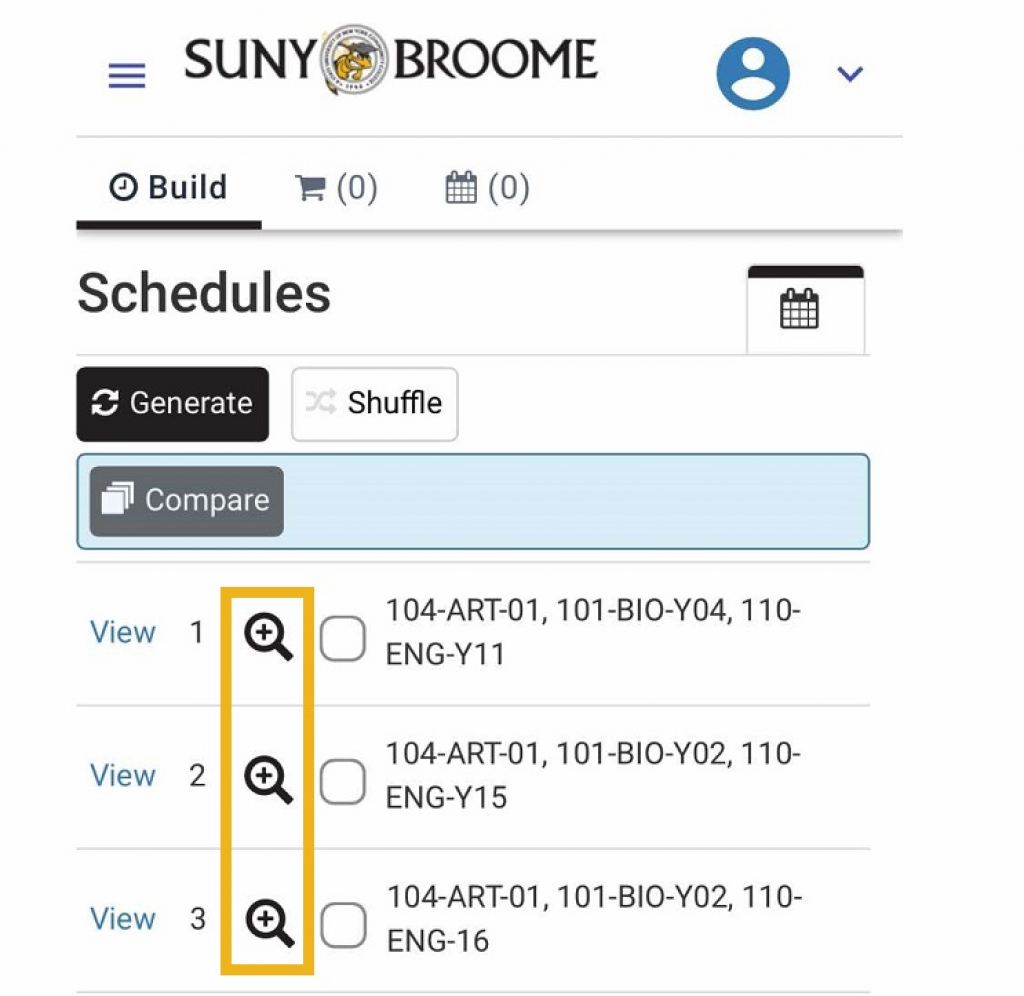
- Select the magnifying glass to preview – select “View” to open individual schedule detail.
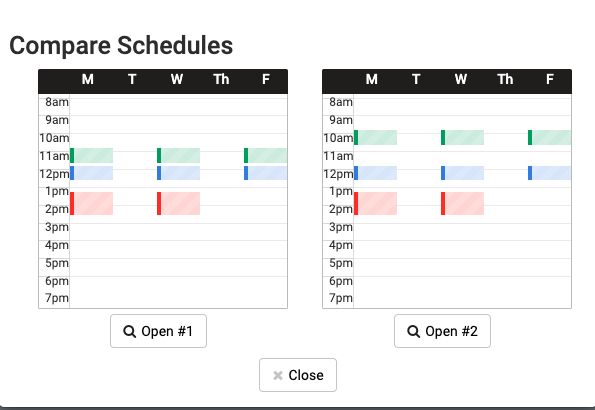
- Compare multiple schedules by selecting top choices and selecting “compare”.
7. Send to Shopping Cart
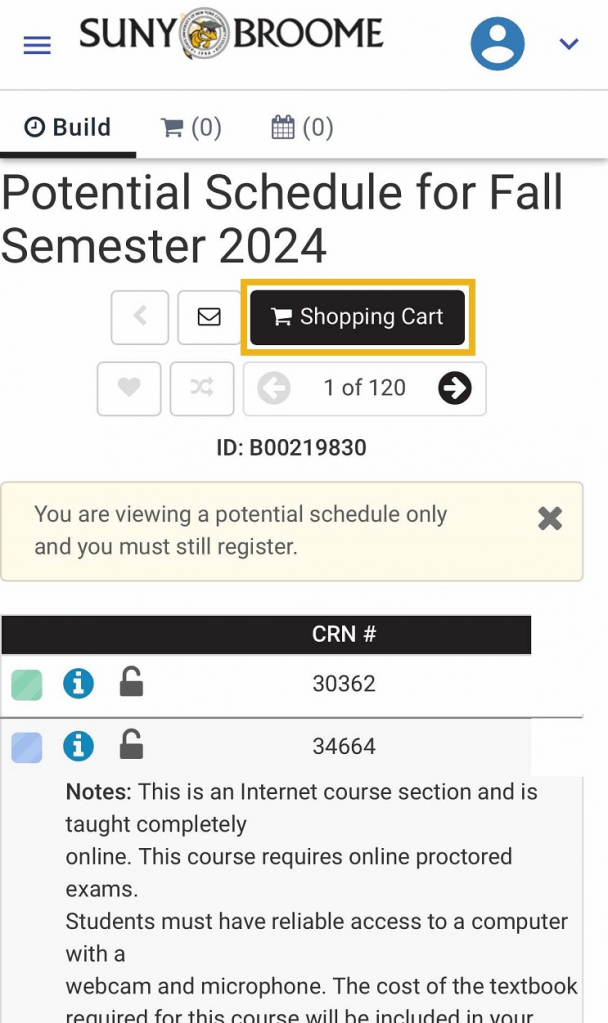
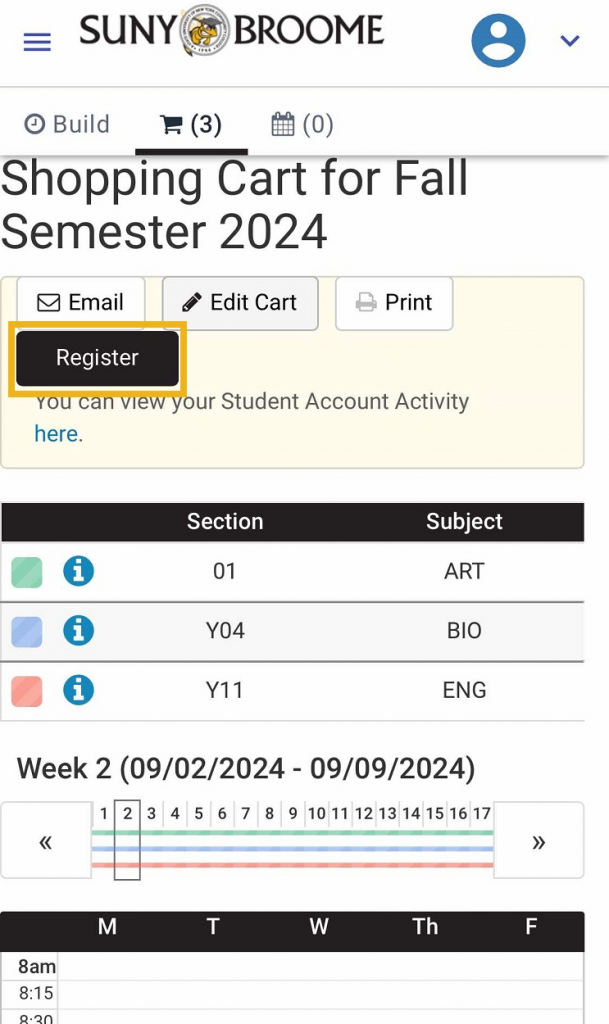
- From the view schedules page, select “Shopping Cart” to move your courses into the shopping cart. If everything looks correct, select “Register” and follow the prompts.
Notes
- *Searching by DegreeWorks Plan only works if you have a DegreeWorks Plan from your Academic Advisor.
- If you are prompted to enter a pin and don’t have one, connect with your Academic Advisor or call 607-778-5421.
- Be sure to read all instructions that may surface in Schedule Planner.
- You can email or print your schedule right from Schedule Planner by selecting the email or print buttons on relevant screens.
- Questions or need help registering? Connect with your Academic Advisor or call 607-778-5421.